Monthly Archives: April 2014
Dakota: 1 Year, 1 Month
Tralala! I decided to just add more words to the same shirt. And maybe I’ll turn the “1” month into butterfly and put a “2” next to it next month. Who knows? 🙂

Here’s last month:
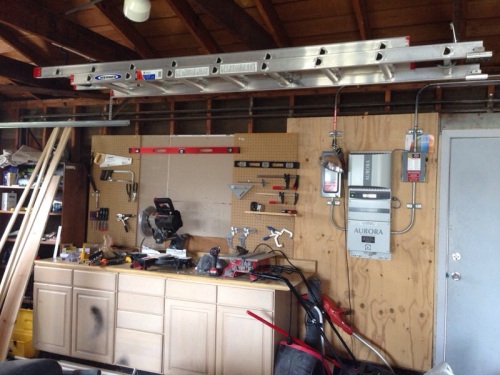
Garage Update!
It’s funny, we had started out the weekend with plans to build this miter saw table thing, and instead we ended up doing a bunch of other garage updates that we talked about doing months ago and then forgot about. Not that I mind… These were all relatively low-hanging fruit: easy fixes with big impacts.
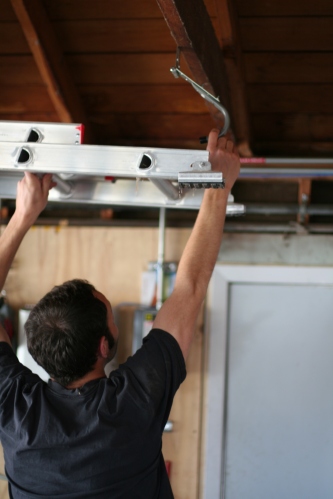
First up, the big ladder now hangs from the rafters!
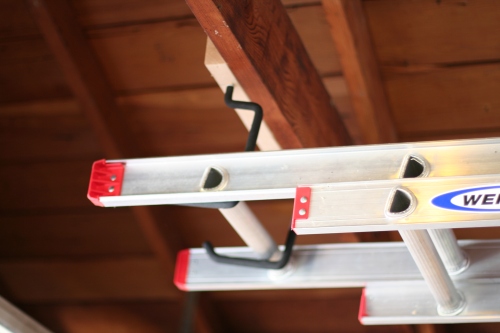
Dave found some solid hooks, and then he came up with this ingenious idea of attaching one of the hooks to a strap hinge to make it super easy to get the ladder down…
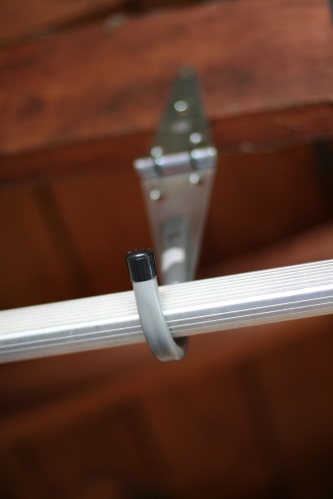
If you’re tall like him and not too short like me. 🙂
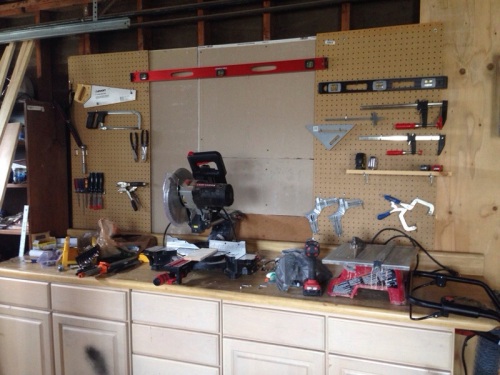
Next… Peg boards! Dave put up some leftover drywall behind the miter saw to hopefully reduce the amount of sawdust getting behind/under the counter, and then he put pegboards up on either side. For the moment I pretty much just threw tools up there without too much planning. Hopefully now that I can actually see what we own I can come up with a better organizing scheme and buy more hanging hooks.
Lastly… Utility sink!
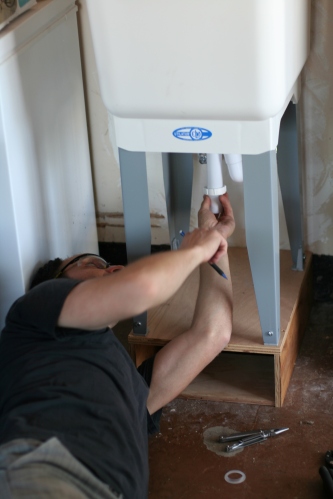
Clearly a previous owner had a sink in here at some point, we even made sure the hookups were all functional when we got the whole house re-piped.
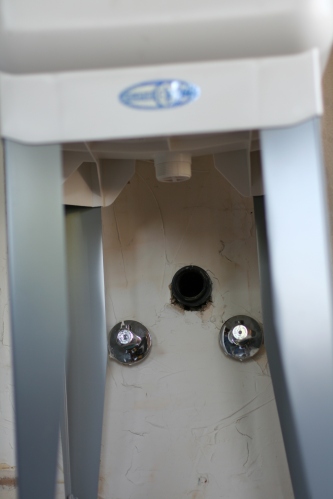
However, the placement of the drain pipe in the wall is quite high and can’t really be lowered (just take my word for it) so we would have had to get a really shallow sink. Orrrr Dave could build a platform for the deep-basin utility sink that we wanted!
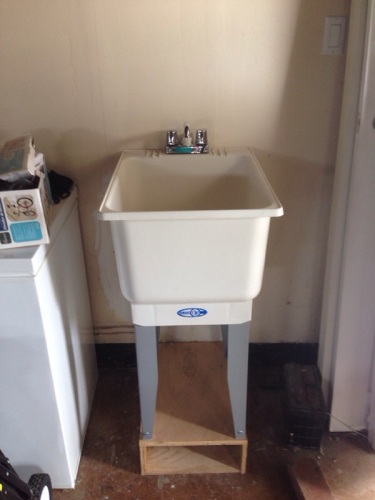
Yessss… No more rinsing paint brushes in the kitchen sink! Now I need to decide what I want to store in that little cubby underneath. Maybe mason jars would fit?
We still want to add a lot more in the way of shelving in here, and of course that miter saw table is still in the works. Oh and we’ll hopefully be setting up a shed on the side of the house soon, so that should get the lawn mower and other random stuff out of the garage. But for now I’m already loving these changes!
Dakota: 1 Year (the start of another set of monthly photos)
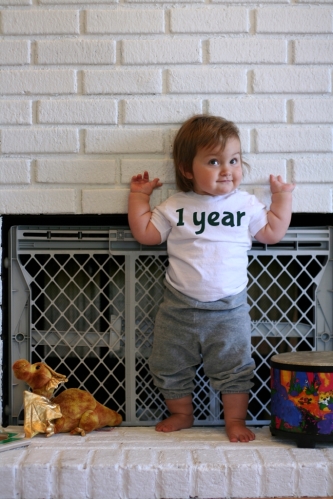
I doubled up the photo for month 12 so that I could have one with the original setup and one with my new setup. My criteria for this new setup pretty much revolved around making the whole affair as low-stress as possible. Here is the result:
The fireplace is great because it gets decent light from multiple windows and it’s really easy to frame the shots consistently from month to month. The baby gate blocking the actual interior of the fireplace isn’t exactly the most photogenic, and it may not be there forever, but too bad I refuse to care. I’m not going to worry too much about random other things appearing on the hearth (like the drum this month) other than vaguely attempting to keep the little gold dragon in the shot. I figure Dakota can keep wearing whatever bottoms she has on for the day, and I can just change her into the shirt for the picture.
The shirt itself is a size 4T undershirt (they run pretty small) that I got in a pack of 5. I painted the lettering on, but it was actually made incredibly easy when I learned the trick of ironing freezer paper onto fabric to make a peel-away stencil…

I was able to buy a pack of freezer paper in regular letter-sized sheets, and print out the design on my inkjet printer. Then I used a craft knife to cut out the letters, and then just ironed the paper waxy-side-down onto the shirt. Painting was trivially easy at that point. Finally I can put the years of randomly accumulated fabric paint to use!

I’m thinking I’ll add the words “and 1 month” to the same shirt for next month. and then… I dunno, cross out the 1 month and paint in “2 months”? Or maybe I’ll switch to another shirt from the same pack after that. Maybe I could add a little picture stencil for each month too? Hmmmmm.
A Year of Monthly Photos
I had a great time getting Dakota’s photo in roughly the same setup on a monthly basis. For posting the new picture each month I just went with whatever cropping and brightness looked good to me, because I knew if I tried to make them all match as I went along it would drive me crazy. After all 12 months were complete though, I figured I could spend a little time and try to make them match a bit better. Here is the result:

Since the belly stickers were all part of the same set and therefore exactly the same size, I was able to use my photo editing software to crop each photo so that the stickers were roughly the same number of pixels across every time. Just for fun, here’s 1 month old and 12 months old together:

If I were to go back and do it differently there’s really only a few things that I would change. My biggest challenge throughout was getting enough light for a good picture. I had this little hobby photo lighting kit with umbrellas and everything, but having to set it up and take it down was an extra stress and I still generally wasn’t happy with the lighting. I think in hindsight I should have just set Dakota up on the blanket in the middle if the floor. That way she would get good ambient light from both living room windows without the obvious shadow cast by the back of the couch. It also would have made it easier to get up on a stool to get the picture. Dave’s tall enough that he may not have needed a stool at all.
The different colored leg warmers were a bit of a splurge but totally fun. I’ve been a surprised looking back as to which ones actually got the most practical use after they retired from the role of photo prop. The striped ones from the 3-month photo seem to end up matching a surprising number of her outfits, and the solid yellow ones from month 11 are nice and neutral and have been getting a lot of use too.
The belly stickers were a gift, and it was nice to not have to come up with a plan for that aspect of the photo. And again, it was nice to be able to use them after the fact to get all the photos to be roughly the same relative size. But as you can see in the last three photos, it was quite a challenge to keep her from ripping the stickers off towards the end.
I’ve already taken the first of the NEW set of monthly photos, so I’ll have to do another post on that one soon. Spoiler, she’s sitting in front of the fireplace, which is nice and white now. (This time last year it was still brick-colored.) But for now I’m just going to finish this by saying that I love the monthly photo thing, and I’m going to stick with it!
Helper Tower
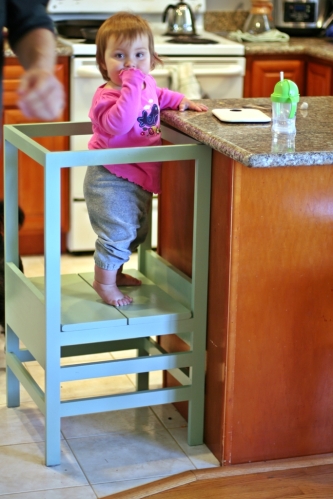
Various companies make these things with names like “Learning Tower” and “Kitchen Helper”, and they seem to generally cost between $100 and $200. But DIY plans exist, and this one in particular seems quite popular and successful.
Of course me being me, I immediately started modifying the plans. I skipped the curved rails and lowered the overall height to 34″ so it would fit under the counter overhang and be more out of the way when not in use. Since it’s shorter, I skipped the highest rail for the platform floor to rest on, so hopefully Dakota can climb in without bumping her head.
At that point I measured out how many boards I would need, and realized that if I used all 1x2s instead of having some of the horizontals be 1x3s, I would only need four 8-foot 1×2 boards, plus one 6-foot 1×8. That brought the cost of lumber down to about $26. I even shelled out for the “select pine” instead of my usual rough-cut furring strips. Fancy.

I screwed all the joints with pocket holes using my Mini Kreg Jig, which I’m liking quite a lot, and I’m not regretting getting it over the full Kreg Jig setup. The Kreg face clamp that I splurged on was pretty key though, and I’m using it for way more stuff than just pocket holes, so it was a good purchase. I have some more normal screw-to-tighten clamps, but they’re 12″ wide and I think I need at least one 18″ wide clamp if I do another project similar to this one. I was able to make it work with what I have though, i think attaching the two sides with the 1×8’s first was the key trick:

Just bringing the boards home my overbuilding self was worried that this would end up too flimsy, but it’s solid like a rock! The 1x3s were definitely not necessary.

For now the platform floor sits on the tallest rail, but we can lower it as Dakota gets taller. I didn’t cut it to be super snug, but it doesn’t move at all once I set it in place. I pulled it off in this picture so you can see how it’s not attached:

Dakota figured out how to push the thing around the kitchen right away, but she hasn’t figured out how to climb in and out of it yet.

She’s super happy when I just set her in it though. It was getting really tough to make dinner or clean dishes because she always wanted to be up in my arms so she could see what was going on. Now I’m already way more productive.
We haven’t had any issues with her stepping sideways and slipping, in fact she looks very coordinated and confident with her hands on the rails, I almost forget that she can’t stand/walk unassisted yet!

Just briefly, my mods call for the following cuts… Cut one 34″ piece and one 16.5″ piece each off of the four 8-foot 1×2 boards. Then cut ten 15″ lengths out of the remaining 1×2 pieces, you should be able to fit three per board, and you have a ~30″ piece left over in case you crack a board or something. 🙂 Then cut two 18″ lengths and two 16.5″ lengths out of the 1×8, and you have all your pieces! You can pretty much follow the original plans that I linked to above after that, just skip the rail that’s 19″ off the ground. Here it is all screwed together, but before I filled the pocket holes with wood putty:

I painted this with leftover matte paint from a tester pot I had purchased (I’m probably going to be painting the spare room that color). It’s the darker shade on the same color card as our living room walls, so I figured it wouldn’t clash. I sealed it with some nontoxic glossy topcoat stuff I already had. I used the same paint plus sealer on the busy board, and it’s holding up great so far… The helper tower is going to be getting a lot of abuse though, so we’ll see how it goes. It wiped up great after a run-in with some smushed strawberries, so that’s promising…

Overall I’m just amazed at how quickly and easily this project came together. The painting was by far the most annoying part, but then again I’m not a very patient painter. I’m actually going to try making another one for a friend, so hopefully my success the first time around won’t turn out to just be beginner’s luck or something.

