Blog Archives
Closet Storage Happiness
Closets aren’t the most exciting thing to read about, nor are they terribly photogenic, but our house has so little built-in storage space that I am now going to spend an entire blog post gushing about the improvements we made to the master bedroom closet. You have been warned.
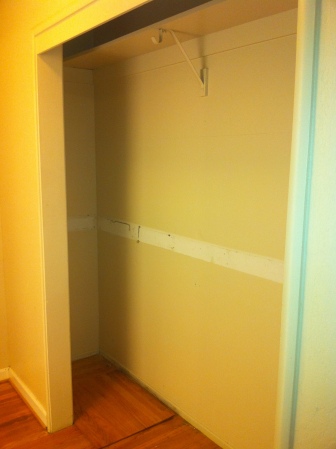
First, here’s a little recap of how the closet used to look, complete with pictures from old blog posts. When we bought the house it was a reach-in closet with sliding doors, accessed via a mini hallway that also had the door to the bathroom on the opposite side from the closet. Here’s the closet as it looked on the day we got the keys, right after I removed the sliding doors and pried out the waist-height shelf:
That mini-hallway is really just wasted space, so almost from day one we were talking about moving the bathroom door and making a small walk-in closet when we remodeled the master bathroom. Check out this short post showing the before and after floorplans if you need the visual.
In the mean time though we added some modular wire shelving that we had bought for a reach-in closet in a previous apartment and kept with us when we moved. And for about a year the view from our bedroom into the closet/mini hallway looked like this:
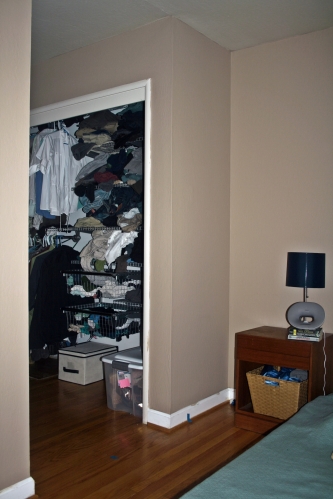
In the picture above you can see a piece of blue painters tape on the floor and one on the floor trim, marking where we wanted the eventual walk-in closet doorway to be. Anyway, fast forward yet another year and we finally got around to tearing the bathroom down to the studs, moving the bathroom doorway out of the mini-hallway and over to the bedroom proper, and framing a doorway for the improved closet. We actually bumped the bathroom out into what used to be the back of the mini-hallway to make more room for the shower, and this left a 30″ wide, 40″ deep cubby in the back of the new walk-in closet. This is because that’s the access point to the crawlspace under our house (you can see the raised square of hardwood in the first picture of this post) so we didn’t want to build a shower over top of it.
The closet is probably as small as you can make it and still call it a “walk-in”. With a 2-foot wide doorway, it’s just wide enough to fit 12″ deep shelving on the left and 24″ deep hanging room for dress shirts and such on the right.
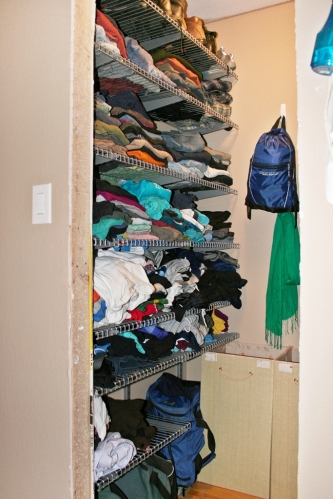
Yup, we’re still using that same modular wire shelving, it reconfigured from a reach-in to a walk-in closet quite nicely.
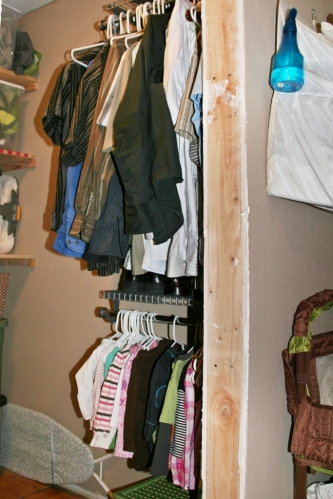
I’m not a big fan of hanging clothing, so we’re fine with having just a tiny bit of rack space. Though in a weird (for me) twist, I actually prefer to hang Dakota’s clothing for now, it’s much easier to see everything that fits her and even hang stuff in order from smallest to largest, so every few weeks I can grab the smallest stuff off the hangers and pack it away in the “too small” box.
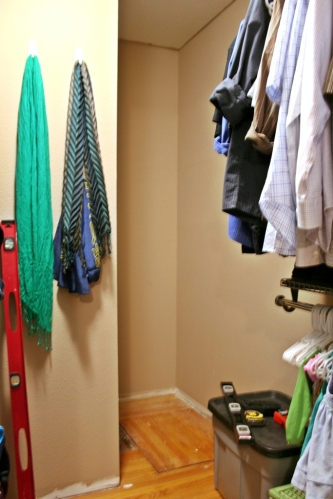
We aren’t completely settled on what we want to do with the back wall. For now we have our laundry hampers there, along with some hooks for hanging small bags and scarves and such. We could potentially put a full length mirror there, or perhaps some sort of wall-mounted necktie or shoe storage. Or we could just add a lot more hooks.
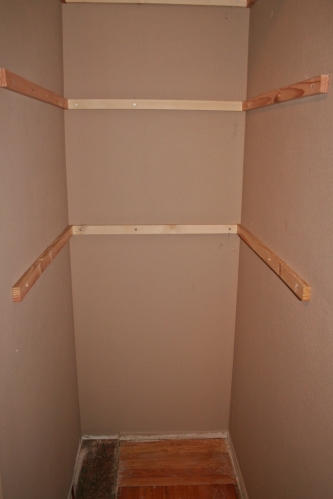
On the back right is the aforementioned cubby with crawlspace access. Here it is still empty:
It’s a good size for storage tubs and we can fit them two-deep if we turn them longways, so I added 1×2 boards (they were labeled as furring strips) as cleats:
And then we cut some 3/4″ plywood to make some heavy duty shelves, and filled them with big ol’ storage tubs (2 deep, so there are actually 10 tubs there even though you can only see 5):

We do occasionally need to access the crawlspace, so I actually didn’t screw the shelves into place. That way we can move some of the tubs and remove one or two of the shelves if someone needs to go in and out of the crawl space a lot and doesn’t want to have to worry about ducking to avoid hitting the shelves.
There are still a few small todos for this space, not counting deciding what we want to do with the back wall. First, the ceiling was primed but not actually painted. On the one hand, I’m glad we got the closet filled and usable as quickly as possible after getting the drywall up, on the other hand, clearing everything out to actually paint the ceiling is probably going to be a pain in the butt. The other thing we need to do is finish the doorway and add floor trim. We sized the doorway to fit a standard sized 2-foot door, but we’ve lived with cats long enough to know that we’d never actually shut the closet door anyway, so we plan to just add trim and not bother with a door. Trim shouldn’t be that hard, but we just have to work up the motivation to break out the nail gun. I’m thinking I probably want to paint those plywood shelves at some point as well.
But in the meantime, this closet is fully functional!

