Blog Archives
Small Updates
We finally got around to a bunch of small updates around the house to improve functionality and/or make things slightly more stylish. 🙂
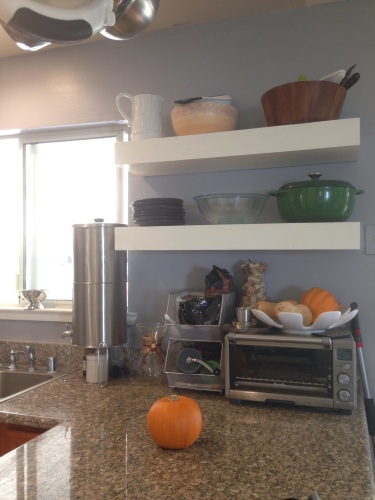
In the kitchen, I got a hanging basket thing to corral all the fruit that was constantly taking up way too much counter space. Here it is hanging to the left of the sink:

I also got some wire mesh baskets to tidy up the coffee making supplies. This area used to just be a big jumble of fruit and coffee filters and such:
The knob on the pantry door busted, so we took the opportunity to switch from chrome to oil rubbed bronze:
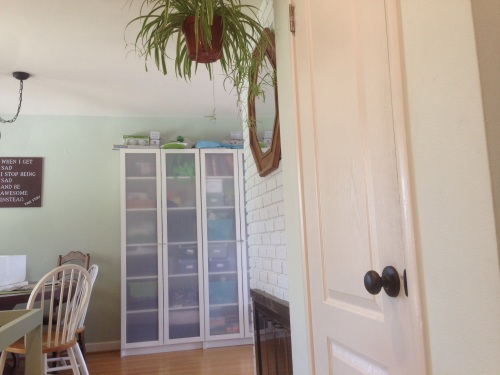
We’re slowly switching over the remaining door knobs in the house, but I’ll spare you a bunch of door glamor shots.
We also finally switched out the chrome-and-rust light fixture for oil-rubbed bronze in the hallway bath:

Back in the kitchen, we re-hung the magnetic knife holder vertically on the side of the refrigerator. Much more functional. And I got these little white containers (to the left of the stove) to hold garlic, but I’m still not sure what I want to do with the onions:
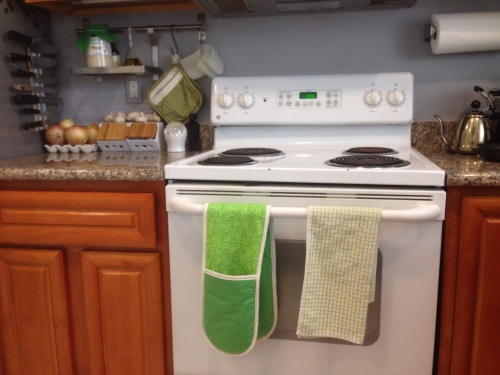
And I made that fun green double oven mitt that’s hanging off of the oven door. It’s mostly just there to look good, but it does actually work… Plus, Dakota likes to steal it and run around giving everyone high fives while wearing it:
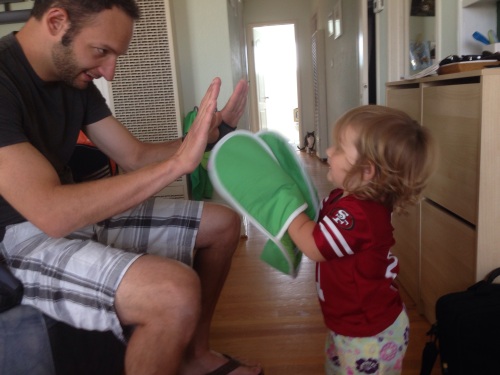
So I think it was definitely a worthy sewing project. 🙂
Pikachu Costume Complete
I blogged earlier this month about how I was in the midst of sewing a Halloween costume for Dakota. To recap: I decided on making a pikachu costume by modifying a Simplicity costume sewing pattern. I was able to sew the body of the costume out of yellow fleece by just following the pattern instructions, so what was left was to modify the ears and add a face, tail, and back stripes. Modifying the ears was pretty straightforward:

I just drew right on the tissue paper to extend the original ears a bit. The red lines are for where I wanted to switch from yellow fabric to black.
I needed to move the ears farther back on the hood to make room for Pikachu’s face, so I pinned them on and then spent a while shifting little tissue paper circles around on the hood until I had everthing more or less where I wanted. George the stuffed animal served as my costume model:

I used the exact same fleece fabric in different colors for the eyes and cheeks, and just left the edges raw since fleece doesn’t fray. I hand sewed them (and the brown stripes for the back of the costume) in place using a running stitch in a matching color thread. This actually worked amazingly well and went pretty fast, even with my sloppy hand-sewing. You have to get your nose up close to even really see the individual stitches, and even then the unevenness doesn’t really detract in any way. And as advertised, no fraying! I may just use fleece instead of felt for future craft projects, since I’ve had bad experiences with felt coming apart when I try to sew with it. And actually I probably could have machine sewed the pieces directly on, but the pieces were so small it probably would have taken me longer to wind the bobbins and thread the machine than just sewing it by hand.
Finished pictures in a moment, but first I want to talk about the tail. After much waffling I decided to add a pipe cleaner inside for support and make it detachable from the costume. Here’s my free handed sketch that I used as a pattern:

And here’s the finished tail:
I machine sewed the two sides together inside out along the top, turned it right-side out and inserted the pipe cleaner and bent it in the right spots, and then hand sewed the bottom closed. In hindsight I probably should have machine sewn the whole thing right-side out and left the raw edges visible, because trying to get all those sharp corners to turn right-side out cleanly was a pain in the butt. I attached two yellow buttons to the tail, one at the top corner and one at the base, and attached two loops of yellow cord to the body of the costume.
Unfortunately, but not unexpectedly, the tail was a bit of a flop, literally it just flopped over to one side while attached. Ah well, I did get a few cute pictures with it on, after detaching the top button:

Oh, for the mouth I just hand-sewed using a back stitch, and then I sewed another line of back stitches right next to it to make it thicker. Anyway, here you can see the back of the costume:

And then I took the tail off and we went to various Halloween parties. 🙂
Here’s a close-up of Dakota sitting. The costume is a little large on her, especially since it was warm enough that she didn’t need to wear much underneath it:

And here she is still not quite crawling, but at least demonstrating that she has decent mobility in this thing:

In that picture you can see the little yellow cord loop where the tail was attached to her butt.
The fleece was a little warm during the day since the temperatures got up into the 70s, but she was able to wear the costume pretty comfortably for pretty long periods without complaint. I liked the way the elastic along the top of the hood worked out, it kept the hood mostly in place without really getting in her way. And in case it wasn’t already obvious, I really loved working with fleece, and I definitely plan to use it again in future projects. The tail was a little bit of a bummer, but this isn’t my first time dealing with floppy costume appendages, so I wasn’t at all surprised by the failure and I don’t think the missing tail really detracted from the overall costume much at all. Now I can’t wait for next year!
Costume Sewing Progress
I had entertained vague notions of sewing a Halloween costume for Dakota, figuring I had better let my creative juices loose now because in a few years she will have an opinion on the matter and insist on being whatever the equivalent is at that point of Rapunzel from Tangled. (My non-scientific poll of three different little girls has determined that 100% of them want to be Rapunzel. Sigh.) But I hadn’t thought seriously about it until another mom at a playgroup we attend turned to me and asked what Dakota was going to be, adding that she had already bought a ladybug costume for her daughter. This was the last week of September, and my first reaction was, “What? So early…” But then again it’s not really that early if I actually want to sew something. So Dave and I had a Very Serious Discussion about what Dakota should dress up as, and we settled on… Pikachu!
I searched around and found a Simplicity pattern (1767, in case you’re interested) for a hooded, footed baby costume that had a few generic baby animal variations, figuring I could modify the ears and add eyes and cheek circles to the hood. I went out and bought some bright yellow anti-pill synthetic fleece (that was luckily on sale) and small amounts of the other necessary colors in the same material. The pattern also calls for a zipper (gulp) and some elastic:
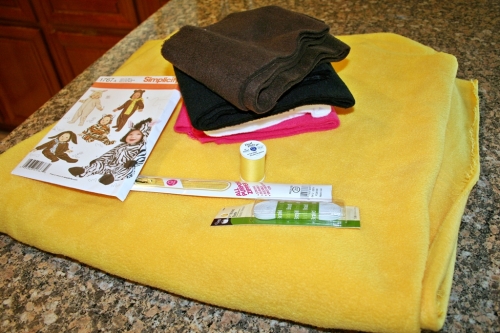
I’m not a sewing expert or anything, but I have mostly gotten over my fear of using patterns. This one is just about my speed: two halves of a front, two halves of a back, two sleeves and two halves of a hood:

In terms of other trickiness, the sleeves have elastic in the cuffs, and the “feet” are made with a single pleat, pretty straightforward. The pattern even helpfully suggests using a “narrow zig-zag stitch” for fleece fabrics. I wasn’t quite sure I was using the right setting on my machine, but it produced a zig-zag, and after a few practice runs on some scrap fabric I figured I had it close enough, so off I went!

I’ve never worked with fleece before, but it doesn’t fray or unravel, and it seems to slide through the machine pretty evenly, so I’d say I’ve been pleasantly surprised with how easy it has been to work with.
I’ve also never actually had to attach a zipper before. I avoided it on my wedding dress by kludging together a lace-up back and duct taping myself into it right before the ceremony. 😀 But miraculously I still have the zipper foot that came with this sewing machine! I didn’t do the most even job of sewing the zipper in, but I think the fleece is poofy enough to mostly hide the unevenness:

At this point I could finally see how it was fitting:

A little big, but the way she grows it may fit her in two weeks. 😉 Anyway, now I have to attach the hood, and then I have to start working on the Pikachu-specific stuff. I think I have the ears modified to what I want. Should I add a tail? It has a pretty distinctive zip-zag, so I would probably either need to use craft foam or wire to make sure it retains its shape.
Well, if all else fails she can just be a fuzzy yellow monster. 🙂
Bedroom Curtains
When our bed was pushed up against the window, our plan had been to put up some sort of decorative wood paneling on tracks that could be closed to completely block the light, sort of a faux headboard. But now that we’ve rotated the bed, we’re thinking about some sort of more traditional headboard, and with that, window paneling made less sense. The pictures of the finished bed made the window look particularly sad and bare:

So we headed out to the store for curtain fabric. I wanted to stay in the blue/white/brown color scheme, and I didn’t just want a single flat color. But I didn’t want too small of a pattern since our bedspread already has a fairly small pattern on it. Unfortunately, the only patterns we were really seeing in the right color schemes were stripes, and with blue and white that just looks way too nautical-themed for my taste. We were close to giving up entirely when we found this fabric:

Perfect! Or at least, close enough for me. I’m really not very decorative/creative in this realm, but this fit the color scheme and the requirements of 1) not too small of a print and 2) not nautical. So we bought five yards and carted it home, where I got acquainted with my new best friend, the rolled hem pressed foot:

I hate hemming. I’m convinced that I’m somehow making it harder than it should be, but I can’t seem to find a shortcut. So whenever I give in and hem something, I end up spending hours measuring, folding, pinning, ironing, folding again, ironing again, and then finally sewing. And that’s for each edge. But a few years back during one of my web searches for shortcuts, I stumbled across this gem of a device and immediately ordered one. It arrived and sat untouched in its package for a long time while I avoided any and all hemming. But I whipped it out today and, somewhat uncharacteristically of me, I actually practiced a bit before trying it on my actual fabric. It’s a good thing too, because it took a bit of practice to get the hem started. You have to make your best attempt at pre-rolling it and starting an inch or so down from the end of the fabric. But hopefully you can kinda see in the picture (sorry about the bad focusing) that the fabric is feeding into the front of the presser foot, rolling over on itself, and coming out the back as a very small, tidy hem.
I wont say it was easy as pie, since I still managed to sew a few wrinkles into the hem, but it’s so neat and narrow that you’d have to hold it a few inches from your face to see the imperfections. And while it still took a decent chunk of time to sew 12+ yards worth of hems, cutting out all of the ironing time made a huge difference. So yeah, I’m pretty proud of myself. 🙂 Here’s a gratuitous shot of me being industrious, either that or Dave really wanted to take a picture of our flowers:

Perhaps someday I’ll have a better spot to sew than the dining room table.
Moving along, the next dilemma was how to hang the things. We wanted the hardware to be pretty nondescript, so we decided we wanted white rings and rod. Internet searches quickly revealed that, especially for a six foot wide window, the most economical option was Ikea, even when you counted the $5 bridge toll it would cost us to get there. So a trip to Ikea (and a few extra dollars spent on “oh we could really use _____”) later, we had a white curtain rod, white brackets, and… Off-white ring clips. Sigh. You actually can’t tell that they’re off-white unless you know to look for them, (and who stares at curtain rings?) but if it starts to annoy me I’ll just spray paint them white. The finials on the rods were pretty silly looking, so I’m thinking I’ll pick up some wooden or plastic spheres at the craft store and make my own.

I still haven’t sewn the bottom hem on the curtains, and I may actually do the more laborious measure, fold, iron, etc method since the fabric is so light and a little extra weight on the bottom should help them hang straight. Here’s a nighttime shot:

As usual, sorry for the bad picture quality. Window photos are tough for clueless non-photogs like me, but I think I might be improving ever so slightly despite myself…
On the light-blocking front, the new curtains just barely cover the whole window when they are closed. I’m planning to eventually add a layer of (white) blackout fabric behind the patterned fabric to make these curtains fully functional at light-blocking. The stuff I’ve seen online that sells by the yard is 54″ wide, so I’m debating maybe leaving it that wide and hanging it so that it looks like there’s a stripe down either side of the patterned fabric. But maybe that will just look silly, so I’m leaving my options open.

